Zul'Aman (Classic)
The subject of this article was removed from World of Warcraft in patch 4.1.0.
|
- For the lore of the zone, see Zul'Aman. For the modern dungeon, see Zul'Aman (instance).
| Zul'Aman | |||||||||||||||
|---|---|---|---|---|---|---|---|---|---|---|---|---|---|---|---|
| ZA | |||||||||||||||
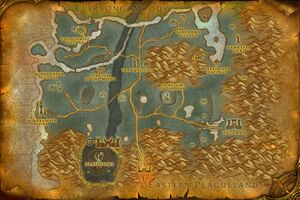
 Zul'Aman loading graphic | |||||||||||||||
| Location | Southeastern Ghostlands[77, 64] | ||||||||||||||
| Race(s) |
| ||||||||||||||
| End boss |
| ||||||||||||||
| Instance info | |||||||||||||||
| Type | Raid | ||||||||||||||
| Level | 70+ | ||||||||||||||
| Minimum level | 68 | ||||||||||||||
| Player limit | 10 | ||||||||||||||
| Lockout timer | 3 days[1] | ||||||||||||||
| |||||||||||||||
Zul'Aman was a 10-man raid dungeon introduced in patch 2.3.0 and was located in the Ghostlands. It has since been reworked and replaced by a 5-player Heroic dungeon of the same name.
It was one of the first instances to require no attunement and was intended to be more accessible to players on tight schedules. It was designed to be more difficult than Karazhan and with better loot.[2] In fact, the first bosses in ZA would often require Karazhan-level gear, while the later bosses would need significantly better - at the time, even Tier 5 equipped groups didn't consider this a walk in the park. Since the instance only contained six bosses, it indeed required less time than a full clear of Karazhan. Though the Ghostlands region is Horde territory, the area around Zul'Aman was considered contested.
Encounters
The instance involved players fighting four avatars of the forest troll "gods": the bear, eagle, lynx and finally dragonhawk. These gods were channeled into the bodies of four troll warriors. After defeating the four gods, players faced off against the witch doctor that called on the gods, and finally against Zul'jin himself. The final troll boss was not only be a powerful foe; he was also able to draw upon the ghostly spirits of each of the four liberated animal gods and change his own shape to access their powers.

Quests
The Zul'Aman quest chain started in Lower City in Shattrath, but could also be started near the instance entrance.
The instance had multiple quest givers outside the entrance for events that occur inside, including time-sensitive missions (e.g. rescues) that offered differing rewards based on how quickly the task was accomplished.[3]
 [70R] Oooh, Shinies!
- [70R] Promises, Promises...
- [70R] X Marks... Your Doom!
- [70G] Hex Lord? Hah!
- [70R] Tuskin' Raiders
- [70] A Troll Among Trolls
- [70R] Playin' With Dolls
Walkthrough

Timed Event
See Zul'Aman timed event
The first four bosses in the zone each had a hostage NPC. Upon entering the instance, a timer started. When it ran out, all remaining hostages were killed. When a hostage was rescued before the timer ran out, it opened a chest with extra loot and added some bonus time on the timer. The feeling was quite similar to the infamous 45-minute Stratholme runs (![]() [60D] Dead Man's Plea) in original WoW. Since the first four bosses could be attempted in any order, there was some leeway for raids to choose a matching boss depending on competence and group make up.
[60D] Dead Man's Plea) in original WoW. Since the first four bosses could be attempted in any order, there was some leeway for raids to choose a matching boss depending on competence and group make up.
Nalorakk
Nalorakk, the Bear Lord was the easiest fight in Zul'Aman. He was a fierce creature the size of a Zul'Gurub berserker with the head of a bear. The encounter was still pretty complex: As the raid made its way up to the boss's platform, Nalorakk sent waves of trash mobs to attack the party, the last of which consisted of trolls mounted on bears accompanied by two trolls. You could not initiate combat with Nalorakk until these last four trash mobs were dead. During the fight, Narolakk alternated between his troll form and a bear form.
Akil'zon
The eagle-headed Akil'zon in the north-western corner was the second-easiest boss and most raids attempted him next after killing Nalorakk. This boss sent waves of non-elite eagles against the raid as they engaged elite trolls on the way up and fended off elite trolls from the flank (Akil'zon gauntlet). The boss fight required some attention and skillful maneuvering by the entire raid, but after some learning it was rather easy to master.
Jan'alai
Next up: Jan'alai, the Dragonhawk hybrid. The path to him was rather uneventful (when compared to the first two bosses), still, packs of fierce trolls and patrols calling for reinforcements offered some challenge. The boss fight itself had an interesting twist. On two pillars, two lairs of dragonhawk eggs were located. If the eggs were smashed, adds spawned from them. During the fight, the boss periodically summoned hatchers to smash the eggs. Although it was tempting to kill the hatchers as soon as they spawn, it was better not to do so and let them crush some eggs, because when the boss' health reached 35%, he spawned all remaining eggs. Besides this, the boss regularly threw a lot of bombs, which the raid had to learn to avoid.
Halazzi
The last of the animal bosses, Halazzi the Lynx Lord, was a very hard-hitting melee/shaman based boss. There wasn't a lot of fancy tactics, it was mostly a gear check for the tank and healers. With Kara/Gruul gear alone, this fight was very difficult, and at least some SSC/TK/ZA gear was recommended.
Hex Lord Malacrass
After the four animal bosses were all defeated, the way to the inner sanctum opened up, leading to Hex Lord Malacrass and the big man himself. Malacrass earned his lofty title by weaving the dark magic that enslaved the animal gods, but alas, his in-game representation was as inert as the lynx and eagle lords'. The trash mob groups leading to him required some skill to master, and the boss himself needed very good interrupts. Besides dealing large amounts of AoE damage to the entire raid, he frequently casted heals which had to be interrupted by all means.
Zul'jin
The end boss of the instance was Zul'jin. The fight consisted of five phases, while the boss shifted through all of the animal aspects encountered before. Each of the phases required a different tactic, the key to success was survival — all raid members had to learn what to do in each phase. To bring him down was the crowning achievement in any Zul'Aman run.
Denizens
 Bears
Bears


 Blood elves (five, Alyson Antille, Brennan, Darwen, Galathryn and Hollee)
 Bog beast (one, Fenstalker)
 Crocolisks
 Dire trolls
 Dragonhawks
 Dwarf (one, Harkor)
 Eagles
 Forest trolls

 Forsaken (two, Deez and Kyren)
 Frogs (critters)
 Ghosts
 Gnomes (two, Ashli and Fudgerick)


 Humans (five, Adarrah, Christian, Gunter, Harrison Jones, and Mitzi)
 Imp (one, Gazakroth)
 Lynxes
 Ogre (one, Thurg)
 Orc (one, Kraz)
 Red dragonspawn (one, Lord Raadan)
 Serpent (one, Slither)
 Snakes (critters)
 Spiders (critters)
 Squirrels (critters)
 Tauren (one, Mannuth)
 Jungle trolls (two, Tanzar and Zungam)
 Wight (one, Koragg)
 Wraith (one, Darkheart)
Trash mobs
 Amani'shi Guardian
- Amani'shi Savage
- Amani'shi Wind Walker
- Amani'shi Medicine Man
- Amani'shi Tribesman
- Amani'shi Axe Thrower
- Amani Bear
- Amani'shi Warbringer
- Amani Bear Mount
- Amani'shi Scout
- Amani'shi Reinforcement
- Amani'shi Handler
- Amani'shi Lookout
- Amani'shi Tempest
- Amani'shi Flame Caster
- Amani'shi Beast Tamer
- Amani'shi Protector
- Amani'shi Trainer
- Amani'shi Warrior
- Amani'shi Berserker
- Amani Lynx
- Amani Lynx Cub
- Amani Elder Lynx
- Amani Crocolisk
- Tamed Amani Crocolisk
Notable loot
See Zul'Aman loot (Classic) for everything that dropped in the instance.
The much sought after ![]() [Amani War Bear] dropped in Zul'Aman as a reward for successfully completing the timed event. At the time it was a very challenging mount to obtain and is no longer obtainable in any way since patch 3.0.2, where it was removed. When Zul'Aman was re-released as a 5-Player Heroic in patch 4.1.0, it was succeeded by a similar mount with a similar unlock requirement, the
[Amani War Bear] dropped in Zul'Aman as a reward for successfully completing the timed event. At the time it was a very challenging mount to obtain and is no longer obtainable in any way since patch 3.0.2, where it was removed. When Zul'Aman was re-released as a 5-Player Heroic in patch 4.1.0, it was succeeded by a similar mount with a similar unlock requirement, the ![]() [Amani Battle Bear].
[Amani Battle Bear].
Gallery


Videos
Patch changes
 Patch 4.1.0 (2011-04-26): Removed and replaced by the Zul'Aman 5-Man Heroic Dungeon.
  Patch 2.4.0 (2008-03-25):
- Jan'alai will now only teleport players to him if they are too far away.
- Pets are now able to properly attack mobs near the walls on the ramps in Zul'Aman, Bear Wing.
- Patch 2.3.2 (2008-01-08):
- The Amani'shi Warrior's Charge ability now has a minimum range.
- The melee haste provided by Halazzi's Frenzy has been reduced to 100%.
- Dragonhawks in Zul'Aman can now be skinned. This doesn't include dragonhawks that do not have loot.
- Patch 2.3.0 (2007-11-13): Added.
References
External links
| |||||||||||