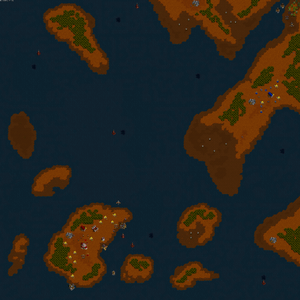
Tol Barad (WC2 Orc)
- For lore about this location, see Tol Barad. For the Warcraft II: Tides of Darkness Alliance campaign mission of the same name, see Tol Barad (WC2 Human).
| Tol Barad | |||||||||||
|---|---|---|---|---|---|---|---|---|---|---|---|
 | |||||||||||
| Location | Dun Modr and Tol Barad, Khaz Modan | ||||||||||
| Result | Orcish Horde victory | ||||||||||
| |||||||||||
| |||||||||||
| |||||||||||
| Previous |
| ||||||||||
| Next |
| ||||||||||
| Alternate level |
| ||||||||||
Tol Barad is the fifth mission of the Horde campaign in Warcraft II: Tides of Darkness.
Mission briefing
The township of Hillsbrad has been decimated, and throughout the Human kingdoms the rumors of impending doom spread like wildfire. War Chief Doomhammer is pleased with your success and has deemed you worthy of a more difficult task. Troubles have arisen in the Dwarven lands of Khaz Modan. A taskforce of Stromgarde warriors have laid siege to Dun Modr - a vital staging area for Horde troops. You are to retake Dun Modr and then bring your forces to bear against Stromgarde's nearby island citadel of Tol Barad.
Objectives
- Retake Dun Modr
- Destroy Tol Barad
Battle
Background
- Note: this account comes from the Official Strategy Guide, which features a first-person description of each mission from the game.
After unloading the Horde forces, the destroyers immediately sailed south to look for enemy oil platforms to seriously reduce the Alliance naval power while they established a base south of the landing point. All of Utok's troops swept into the village of Dun Modr and slaughtered the inhabitants before the Horde brought in the catapult to work on their structures. Once the village was secured, they summoned the workers and had them build two pig farms north of the gold mine in the clearing, which served to block enemies from entering from that direction. While lumber was gathered to the east, a great hall was constructed in a defensive east-west line just south of the mine. During this time, they trained as many slaves as possible to work, for they would need to build up quickly.
The Horde's amphibious force needed many structures to produce the necessary warships and troops, so a lumber mill, a blacksmith, and a barracks headed the list. With those completed, a shipyard was built on the east shore near an oil patch, and tankers were launched to exploit it. Their starting destroyers had managed to prevent enemy tankers from installing another platform by resting on the oil, which prevented them from producing more ships, so the Horde had little to worry about. Soon, they had a flotilla of six destroyers and two transport ships with which to make the assault.
They loaded eight grunts and four catapults onto the transports and set for the west side of the enemy city, behind the mine there. It was only a matter of time before the town was in ruins. The destroyers went out to clear the seas of any remaining enemy ships. Utok believed the Gods were pleased that day; and that their ascension to power was well under way.[1]
Aftermath
The Horde had successfully left Tol Barad in ruins. No life more complex than a few hardy weeds and insects survived the Horde's bloody victory.[2] While the Horde might have initially retaken Dun Modr, they lost it soon after. The Alliance held the ruins after the war, attacking the remaining orcs in the region.[3]
Years later, the island nation of Kul Tiras claimed the former stronghold of Tol Barad and established a prison over the ruins of the old fortress.[4]
Forces
 Grunts
 Axethrowers
 Catapults
 Zeppelins
- Warships
 Footmen
 Archers
 Ballistae
 Flying machines
- Warships
Notes
- The map is similar, but not identical, to its human campaign counterpart.
Video
References
- ^ Warcraft II: Tides of Darkness The Official Strategy Guide, pg. 168-169
- ^ Day of the Dragon, pg. 121
- ^ Day of the Dragon, pg. 180
- ^ Told Barad - Game Guide
| ||||||||||

