Betrayal and the Destruction of Alterac (WC2 Human)
| Betrayal and the Destruction of Alterac | |||||||||||
|---|---|---|---|---|---|---|---|---|---|---|---|
 | |||||||||||
| Location | Alterac City, Alterac Mountains | ||||||||||
| Result |
Alliance of Lordaeron victory
| ||||||||||
| |||||||||||
| |||||||||||
| |||||||||||
| Previous |
| ||||||||||
| Next |
| ||||||||||
| Alternate level |
| ||||||||||
Betrayal and the Destruction of Alterac is the eleventh mission of the Alliance campaign in Warcraft II: Tides of Darkness.
Mission briefing
Lord Lothar sends word that the Alliance has been betrayed. Lord Perenolde - sovereign ruler of Alterac - has been working with the Horde since the beginning of the war. It was Perenolde who provided the Orcs with the routes of the Elven strikeforce passing through Tarren Mill. The rebellion at Tyr's Hand was also started by Alterac spies in hopes of concealing the Orcish mining facility located there. The High Command has decreed that the nation of Alterac has committed treason against the Alliance and their union with the Orcish Hordes must be broken. You must free those unjustly held by Perenolde and enlist their aid in launching an attack against Alterac's capital.
Objectives
- Free the Mages and Peasants
- Destroy Alterac
Battle
Background
- Note: this account comes from the Official Strategy Guide, which features a first-person description of each mission from the game.
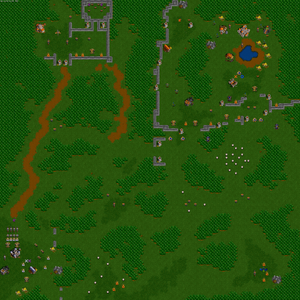
Having interrogated the treacherous warriors of Alterac, and discovering that the Alliance had been betrayed, Lothar sent Milan's force and others to Alterac. Rescuing the captive mages and peasants was of paramount importance, for Milan's force had no workers and no gold to train them. They formed a standard land attack group of knights and ballistae, then set out on the north road leading to the compound. Getting in was troublesome, but not difficult, since their ballistae had a slightly greater range than the enemy towers. After breaking in and freeing the captives, they sent most of the force back to town, but not before destroying all they could.
With workers plundering the gold mine, they then began fortifying the town with towers and farms, closing off all the paths but one for their troops to use. Next came the construction of stables for their knights, and soon after, the fortification of their keep into a castle. Since their attack plan required only paladins and ballistae, their final construction was a church, and from then on, they concentrated on producing the necessary military units. Time and gold were also spent on the blacksmith to provide the best possible weapons and armor. When they had gathered nine paladins and four ballistae in the courtyard, their force was deemed ready to make the assault.
Moving out to the northeast, their paladins led the way for the slower ballistae, occasionally stopping to wait impatiently for them. At first they met with only a few enemies, but as they drew near the walls of the capital, greater numbers of Horde and traitorous human forces slowed their progress considerably. After they had leveled several towers and secured an open area within the walls, reinforcements were called for and sent out while the paladins practiced their healing arts on the wounded. Following the advice of their spies, they decided to march north along the inside of the west wall. Taking out towers along the way and ignoring lesser structures until later. Soon they were inside the heart of the capital, but they had taken a great deal of punishment. Still more paladins were called for, and before long, they had their revenge on Lord Perenolde.[1]
Aftermath
With the destruction of Alterac the pass through the Alterac Mountains was closed by Stromgarde warriors and at least half of the Blackrock clan was as such cut off from the rest of the Horde. The Horde had invaded Capital City but without more reinforcements from the Alterac Mountains and without the support of Alterac they started losing the battle.[2] With the betrayal of Gul'dan simultaneously with this defeat, Orgrim Doomhammer had no choice but to retire.[3]
Forces
 Footmen
 Archers
 Rangers
 Knights
 Paladins
 Ballistae
 Mages
Mages
 Flying machines
 Grunts
 Axethrowers
 Ogres
Ogres Catapults
 Zeppelins
 Dragon
Video
References
- ^ Warcraft II: Tides of Darkness The Official Strategy Guide, pg. 134, 135
- ^ Tides of Darkness, pg. 286-287
- ^ Tides of Darkness, pg. 284-285
| ||||||||||

