User:Joshmaul/Ordevaas Portalseeker/In-Game Accomplishments
This article is a player character biography page The contents herein are entirely player made and in no way represent official World of Warcraft history or occurrences which are accurate for all realms. The characters and events listed are of an independent nature and applied for roleplaying, fictional, speculative, or opinions from a limited playerbase only. |
| |
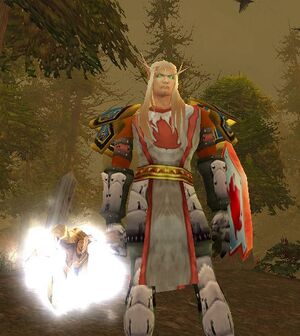
| Ordevaas Portalseeker | |
|---|---|
| Server: | Medivh |
| Guild: | annihilation association |
| Rank: | Alt |
| Honor Rank: | None |
| Talent Spec: | Retribution |
| Professions: | Mining 211 |
| Jewelcrafting 213 | |
This is a listing of the in-game accomplishments of Ordevaas Portalseeker For accomplishments after level 58, see here.
Homecoming
Note: This is from my perspective while playing Ordevaas in the beta test; none of the experiences are unique to this character. With the exception of who accompanied me during the Dar'Khan fight, all of this was repeated in the main game as well.
Ordevaas arrived on Sunstrider Isle, the location of the Sunspire that guarded the Sunwell, where he began his training in the ways of the Blood Knight. He was instructed in the ways of defeating his thirst for magic, and yet sapping the magical powers of his opponents. His proficiency with the mana tapping ability now used by blood elves became deadlier when used along with his skill with weapons, which had not been forgotten in his thirty years as a priest in Lordaeron and Stormwind. He was especially proficient in two-handed swords, and once he took up the mantle of the Blood Knight he began retraining himself accordingly.
Early in his training, Ordevaas was dispatched to deal with the corrupted wraiths that had inhabited the Falthrien Academy. A blood elf named Felendren the Banished, who had become one of the crazed magic-hungry lunatics known as the Wretched, had set up in the Academy and the wraiths were there to do his bidding. Ordevaas entered the Academy alone with only a sword and some luck, and wiped out the wraiths defending the summit of the floating academy before confronting Felendren himself. The mana tap ability he had learned upon returning to Silvermoon served him well, and Felendren fell dead at his feet.
Moving into the Ruins of Silvermoon - the western districts that were left in ruins when the blood elves reclaimed the city - Ordevaas continued his war against the vile Wretched, cleansing the area of crazed arcane guardians and other invaders as he fought his way to their leader, Aldaron the Reckless. With Aldaron dead, Ordevaas moved on to Fairbreeze Village, where he conducted more campaigns against the Wretched at the Sunsail Anchorage - the port in Eversong that had been ruined and abandoned since the Third War. He was also called to do battle with the long-time enemies of the defenders of Quel'Thalas - the Amani forest trolls. Commissioned by a dying Darkspear troll to kill the chieftain of the Amani in Eversong Woods, Zul'Marosh, Ordevaas essentially ended the reign of the Amani in Eversong.
The First Trial
While in Fairbreeze Village, Ordevaas received a summons to Silvermoon from Knight-Lord Bloodvalor, a leader of the Blood Knight Order, in the Blood Knights' headquarters in Farstriders' Square. Bloodvalor dispatched him to a cave in northern Ghostlands, where he would light a brazier to conduct his first trial. As he lit the brazier, he was attacked by a Blood Knight named Sangrias Stillblade. Though he was confused at first, and the fight was brutal, Ordevaas killed Stillblade in single combat. When he returned to Silvermoon, it was revealed that killing Stillblade was the trial - which would lead to gaining the ability to resurrect. Tapping the power of the captive naaru M'uru beneath Blood Knight headquarters, Ordevaas was able to develop some kind of potion that resurrected Stillblade - his body having been brought to Silvermoon by other Blood Knights. Ordevaas learned how to resurrect others as part of his manipulation of the captured naaru energy.
The Ghostlands
Ordevaas was dispatched to his hometown of Tranquillien, now the center of the blood elf resistance against the Scourge. Early operations sent him against the plagued animals of the lands, the gnolls that had taken the Underlight Mines to the west of Tranquillien, and - of course - the Scourge that had taken over the blood elf settlements of Suncrown, Goldenmist, and Windrunner. While exploring Windrunner Spire - the former citadel of the famous Windrunner family - Ordevaas found a necklace that had been a gift to Sylvanas, the Queen of the Forsaken, from her sister Alleria - who had disappeared in Outland twenty years earlier. After his business was done, he travelled to the Undercity and delivered the pendant to the Dark Lady.
Traitor's End
Six years earlier when Arthas invaded Quel'Thalas, a high elf named Dar'Khan Drathir, embittered and power-hungry, took two artifacts - the Stone of Flame and the Stone of Light - that were powerful wards against the Scourge. Ordevaas located both artifacts in two ziggurats along the Dead Scar, and delivered them to Magister Kaendris at the Sanctum of the Sun to forge into a sword capable of harming Dar'khan. Once this artifact was created, Ordevaas travelled with his old friend Kyralt, a priest from Silvermoon, and attacked the Scourge fortress of Deatholme in the southern Ghostlands.
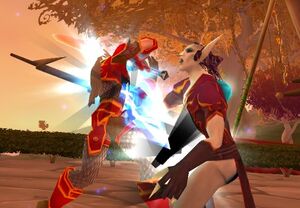
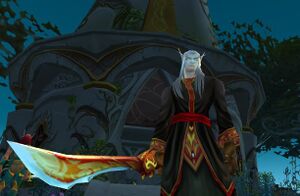
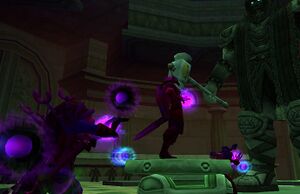
The blood elf party, consisting of Ordevaas and Kyralt, another Blood Knight, a hunter and a mage, assassinated all four of Dar'Khan's lieutenants in the various structures in the vile fortress before moving on the Tower of the Damned - Dar'Khan's citadel at the center of the establishment. Ordevaas and the party killed both of the traitor's necromancer defenders before finally focusing on Dar'Khan himself. The undead elf and the Blood Knight were locked in combat, necromancer's staff versus holy blade, with the fate of Quel'Thalas in the balance. Aided by the valiant blood elves united with him, Ordevaas decapitated Dar'Khan and delivered his head to Kaendris. As a reward, Ordevaas received a Sin'dorei Warblade, a two-handed sword of immense power, while Kyralt received the Staff of the Sun.
Hero of the Sin'dorei
Ordevaas delivered the traitor's head to Lor'themar Theron, Regent of Quel'Thalas, in Silvermoon. Realizing that this had solidified the blood elves' position within the Horde, Lor'themar sent Ordevaas as an envoy to the Horde - first to Sylvanas in the Undercity to have her place her seal on Lor'themar's letter to the leaders of the Horde...before it was to be delivered to Thrall, Warchief of the Horde, in his capital of Orgrimmar.
Attired in the robes of a Tranquillien apothecary, Ordevaas arrived in Orgrimmar onboard a goblin zeppelin from the Undercity across the seas to Durotar in Kalimdor. Going directly to Thrall's fortress of Grommash Hold in the Valley of Wisdom, Ordevaas delivered Lor'themar's letter, bearing Sylvanas' seal, to the Warchief. While Thrall seemed reluctant, he admitted that the blood elves had proven their worth to the Horde, and proved that the blood elves needed the Horde as much as the Horde needed them. Grudgingly, Thrall welcomed Ordevaas to the ranks of the Horde.
The Second Trial
Note: After this point, this is from the perspective of my playing Ordevaas in the main game.
After defeating Dar'Khan and ending the debate on the blood elves' viability in the Horde, Ordevaas returned to Silvermoon to speak with his master, Bloodvalor. The Knight-Lord sent him to Master Kelerun Bloodmourn, a Blood Knight who resided near Sunstrider Isle to the northwest, for his second trial by combat. This time it was not one but four Blood Knight champions - Bloodwrath, Lightrend, Swiftblade and Sunstriker - he had to defeat. Gripping his sin'dorei warblade and fighting off his foes with deadly accuracy, Ordevaas was brought nearly to the brink of death before the final blow was struck against his opponents. Returning to Bloodvalor, Ordevaas received the next quest down the path of the adept: The forging of the ![]() [Blood-Tempered Ranseur].
[Blood-Tempered Ranseur].
Ordevaas made one final trip to Deatholme, to locate the body of a Blood Knight from the Dawnstar family who led a courageous but failed assault on the Scourge fortress. Dawnstar, Bloodvalor explained, would provide the insignia of the Blood Knight adept that Ordevaas would carry. Aided by members of the Mounties, Ordevaas travelled through Ragefire Chasm to slay a demon for blood of the wrathful, the stables at Shadowfang Keep for a crate of bloodforged ingots, and Blackfathom Deeps for a corrupted kor gem. Upon collecting the materials, Ordevaas returned to Silvermoon and delivered the materials to Bloodvalor, who sent him to the blacksmith Bemarrin to create the weapon for him. After a little time and patience, the spear was made and given to him as a mark of his new rank.
Legion of Anasterian
As he gained strength by battling various foes - from the Scourge to the Scarlet Crusade, from Alliance infiltrators in Dustwallow Marsh to solders in the battlefields of the Arathi Highlands, and even to a small degree, silithid invaders - Ordevaas met Ludovicus, a fellow Blood Knight, of the illustrious Dawnstar line - ironic, considering the Adept's insignia both men carried was from a daring Blood Knight of that family. Ludovicus was a soldier of the Legion of Anasterian, a group of blood elves who revered the last true King of Quel'Thalas, Anasterian Sunstrider. Ordevaas' father and daughter had both joined the Legion, connecting Ordevaas himself to its ranks (though he remained among the Royal Undercity Mounties). While he was in Thousand Needles, Ordevaas was approached by a courier, wearing the colors of Thrallmar - which meant that he had come all the way from Outland. His master, Joshmaul the Warlock, had new orders...
Joshmaul had been appraised about the Legion of Anasterian, and knew that Ordevaas - the warlock's chief lieutenant - had befriended Ludovicus, who aspired to be the Legion's commander. The warlock was aware that the current commander of the Legion, Princeps Octavianus, was weak and ineffectual...and Ludovicus, craving power, would be a fine substitute. Joshmaul gave his support to Ludovicus, and commanded that in exchange for his aid (via Ordevaas), the Legion would serve his needs as well as that of their people. Ludovicus agreed, and in a bloodless coup deposed the Princeps, demoting him into the Legionnaires and assuming command himself.
Ordevaas remains part of the Royal Undercity Mounties, but through his father, Kel'theris, could possibly wield power within the Legion of Anasterian as well...
Triage: Practicing at Horde Trauma
Ordevaas - a practicing physician after becoming an expert at first aid (his healing powers, while still intact, had been hampered somewhat by his decision to focus more on close combat) - had been summoned to "Horde Trauma", the primary Horde treatment center, located at the outpost of Hammerfall in the highlands of southern Lordaeron. The head surgeon of Horde Trauma, Dr. Gregory Victor, needed Ordevaas' help to perform triage on critically injured soldiers.
Ordevaas performed brilliantly, completing his task without a single death, and received more training from Dr. Victor; now, all he needed was to reach Outland in order to further his training to mastery.
Uldaman: The Secrets of the Titans
Aided by a pair of shaman from the Mounties, Sonsuh and Annaie, Ordevaas ventured into the Badlands of Khaz Modan and entered the dig site that held the ancient city of Uldaman. The Titans hid their secrets well here, but Ordevaas was in it simply for the plunder and destruction. He obtained the two pieces of the Staff of Prehistoria - the Medallion of Gni'kiv and the Shaft of Tsol - and activated the Keystone, opening the chamber in the Map Room holding the Titan construct Ironaya. Venturing through the ancient ruins, Ordevaas battled through waves of awakened Earthen, Dark Iron infiltrators, troggs, and Titanic mechanisms left buried beneath Khaz Modan for millennia.
Eventually, Ordevaas and his party came face to face with Archaedas, the guardian of the Discs of Norgannon. Through the Lore Keeper of Norgannon - a holo-projection activated in the Disc chamber - Ordevaas learned the secret behind the troggs and the dwarves. The troggs were failed mutations of the Earthen (an experiment which also produced the dwarves), and were shunned by the Titans because of their low intellect and tendency towards cannibalism (as troggs were made from rock, they ate anything made from rock - including each other). The dwarves were considered the more successful experiment, and thrive to this day. With this knowledge, Ordevaas departed Uldaman and returned to the Arathi Highlands...with a rather interesting necklace he had found.
Titans, Traitors and Trol'kalar: Adventures in Northern Lordaeron
Ordevaas returned to northern Lordaeron where he underwent a series of adventures - battling a Titanic princess, delivering Horde justice to a group of traitors, and retrieving a powerful weapon.
Titans: Battling Myzrael
Arriving at the predestined location, Ordevaas encountered a crystal shard of incredible power, and the shard spoke to him. The entity's name was Myzrael, a princess of the earth trapped beneath the surface by four circles of binding spread throughout the highlands. She beseeched him to find a way to free her from this imprisonment, and dispatched him to battle kobolds in Drywhisker Gorge. Upon speaking to the crystal shard there, Ordevaas was instructed to find the keys to the Circle of Inner Binding, where the Keystone that held her was located. In order to do so, he had to retrieve the keys from the Circles of West, East and Outer Binding and take them there. After completing this task, he was joined by the warrior Tothjowii, and they hunted down the giant Fozruk and took an artifact called the Rod of Order from him to the Keystone at the inner circle.
Then he was sent back to the Badlands, where he encountered Theldurin the Lost, a raving madman who - in rare moments of lucidity - revealed valuable information. Theldurin informed him that she had to be entrapped once more before she became too powerful, and that the Scroll of Myzrael - that could summon her from her prison - had been torn apart by enraged rock elementals near his camp. Destroying many elementals, Ordevaas finally retrieved the three pieces and brought them to Theldurin, who restored the scroll into its whole state. He then returned to Arathi, where he summoned Myzrael (too soon, as she told him), and defeated her. Taking her eldritch shackles, Ordevaas once more bound them to the shard, thus undoing everything he had done to release her...and earning her emnity in the process.
Traitors: Sending a Message
While in Stranglethorn Vale days earlier, Ordevaas was dispatched to the Hinterlands by the troll Nimboya. The Witherbark tribe had once been loyal servants of the Horde during the days when Zul'jin pledged the Amani to the service of Orgrim Doomhammer, and broke away when the orcs were held in the internment camps. Nimboya gave Ordevaas his spear to plant the skulls of the Witherbark at one of the two villages they controlled in the Hinterlands.
A day after defeating Myzrael, Ordevaas returned to Lordaeron and killed the Witherbark trolls, taking their skulls and planting them on Nimboya's pike in the center of the village of Zun'watha.
Trol'kalar: Destroying the Royal Bloodline of Stromgarde
Nimboya had also requested that Ordevaas travel to the Arathi Highlands to speak with the scout Zengu, who was attempting to retrieve the sword Trol'kalar - the blade of Ignaeus of Strom. Once the blade was in the Horde's possession, the trolls in Stranglethorn would be able to do battle with the Gurubashi trolls, the thralls of Hakkar the Soulflayer.
After the battle with Myzrael, Ordevaas travelled with his friend Tothjowii into the depths of Stromgarde Keep and retrieved four powerful sigils that could unlock the tomb of Thoras Trollbane, the last King of Stromgarde - the Sigil of Strom, the Sigil of Thoradin, the Sigil of Arathor, and the Sigil of Trollbane. The Sigil of Strom was held by the Syndicate in the district nearest the gate. The Sigil of Thoradin had been split up among the militia defenders of Stromgarde, and required the services of the shaman Tor'gan to reassemble. The Sigil of Arathor was held by Lieutenant Valorcall, a Stromgarde cavalry officer who patrolled between the keep and Refuge Pointe, the Alliance outpost in Arathi Highlands.
The last sigil - the Sigil of Trollbane - was held by Prince Galen, the son of Thoras Trollbane and current leader of Stromgarde. Though the prince was a formidable warrior in his own right, he was no match for the battle-hardened tauren warrior that Ordevaas brought with him. With the final sigil in his possession, he returned to Hammerfall where he combined the sigils into one - the Sigil of Ignaeus. Joined by his friend Ludovicus, Ordevaas travelled deep into Stromgarde near the chapel where he and Tothjowii had killed Prince Galen. Behind the church was a large crypt; deep inside was the sarcophagus of Thoras Trollbane, with the sword held in the stone fingers of the man on the lid. Upon activating the Sigil of Ignaeus, the fingers released the sheathed weapon, and Ordevaas immediately took it and brought it to Zengu, who then promptly delivered it to Nimboya.
Thalassian Warhorse
After battling to obtain the sigils that opened the tomb of Thoras Trollbane, Ordevaas finally obtained the level in his adepthood to be granted the ability to ride a Thalassian warhorse. These black horses with black and brass livery serve as the symbols of the aspiring masters, and Ordevaas is well on the way to reaching this esteemed rank.
Atal'Hakkar: The Soulflayer Returns
While battling bandits and pirates in Tanaris, Ordevaas met a troll named Yeh'kinya at the Steamwheedle Port. Yeh'kinya informed him that the vale screechers of Feralas were the cousins of an ancient deity, Hakkar the Soulflayer. Hakkar was the nefarious Blood God whose worship had divided the ancient Gurubashi Empire. His most devoted servants, the Atal'ai, sought to summon him within their great shrine - the Temple of Atal'Hakkar in the Swamp of Sorrows. The Green Dragonflight, led by the great Aspect Ysera, acted against the Atal'ai and sunk the Temple of Atal'Hakkar to the bottom of the bog, but the Atal'ai survived and continued their plans to summon Hakkar - "foolish trickery to bring about a premature doomsday, if you ask me," according to the orc warlock Fel'zerul.
After obtaining the spirits of Feralas screechers, Yeh'kinya dispatched Ordevaas to find the tablets containing the Prophecy of Mosh'aru - information on how to contain Hakkar and prevent him from returning to the world of Azeroth. Saying that there were two, Yeh'kinya directed Ordevaas to the city of Zul'Farrak, to the west of Gadgetzan, and obtain them from Theka the Martyr and the Hydromancer Velratha. With the aid of Tothjowii, he was able (with some difficulty) to kill both and take the tablets from their corpses.
Next, Ordevaas contacted his master, Joshmaul, and informed him that Yeh'kinya had dispatched him to retrieve some kind of ancient egg from the temple of Jintha'Alor in the Hinterlands. This egg, Yeh'kinya told him, could contain the essence of Hakkar, if the avatar of the Blood God could be raised from within the sunken Temple of Atal'Hakkar. The egg's properties would prevent Hakkar from materializing in Azeroth. With his mission in mind, Ordevaas rode through the treacherous rises of Jintha'Alor and hid in the egg chamber until Joshmaul arrived. With powerful shadow magics, Joshmaul killed Hitah'ya the Keeper and her guards and allowed Ordevaas to obtain the egg. What was left now was sending Ordevaas to the Temple of Atal'Hakkar, destroy the Avatar of Hakkar and contain its essence within the egg.
After defeating Atal'alarion, Ordevaas and his party - led by Guild Master Croagbagel, the troll rogue who commanded the Mounties - entered the Sanctum of the Fallen God, where Ordevaas set the egg in the place where Hakkar's bones lay. With an echoing scream of victory from the chained god, Ordevaas had awakened the Soulflayer.
The Avatar remained trapped in stasis, with four eternal flames burning to keep him there - a safeguard set up by the Green Dragonflight. The Hakkari bloodkeepers, spawn of the Blood God, kept the blood necessary to douse them. With some effort, the flames were doused, unleashing the Avatar upon the Mounties. But they were ready - Guild Master Croagbagel and his lieutenant, the undead priest Sheperd, unleashed their formidable powers upon the creature, and Ordevaas himself was there, his sword moving swifter than he could have imagined. Finally, the Avatar of Hakkar fell dead, and Ordevaas took the essence of the Blood God, trapping it within the egg he had taken from the Hinterlands.
Returning to Yeh'kinya and giving him the egg, Ordevaas found out a horrible truth about the Prophecy of Mosh'aru from the nearby dwarf Prospector Ironboot: There were six Tablets of Mosh'aru, not just two. Ironboot gave him a new mission - to travel deep into the Eastern Plaguelands and obtain the third and fourth tablets from the Mossflayers at the temple of Mazra'Alor in Zul'Mashar...
Eranikus the Chained: The Blood Knight's Cruelty Made Manifest
When Ysera sunk the Temple of Atal'Hakkar into the depths of the Pool of Tears, she dispatched five of her own to battle the survivors of the Atal'ai: the dragon Eranikus and the drakes Dreamscythe, Weaver, Morphaz and Hazzas. But Eranikus was corrupted by the Nightmare, the dreaded power that has now infected the Emerald Dream - believed to be the doing of Hakkar the Soulflayer, the deity that Ordevaas had just (supposedly) imprisoned. Upon defeating Jammal'an the Prophet, thus destroying the power of the Atal'ai, Ordevaas and his party encountered the shade of the mighty green dragon, slumbering within the Chamber of the Dreamer.
Eranikus, greatly weakened by the Nightmare's corruption, was defeated easily by the Mounties. Taking the essence of the dragon, Ordevaas brought it to the essence font nearby, as Eranikus instructed. Rather than freeing him, as Eranikus had hoped, it chained him forever to the gem in Ordevaas' hand - the corruption of the Blood God having taken hold, even in an essence font of the Green Dragonflight. Eranikus pleaded with Ordevaas for him to be freed from this state, but Ordevaas - in a cruel gesture of dominance - kept the dragon imprisoned in the gem, and used the powers within to unleash clouds of poison against his foes.
The Secrets of Maraudon
Long ago, the elemental Princess Theradras, daughter of Therazane the Stonemother, seduced Zaetar, the original Keeper of the Grove. From their union was born the centaur - corrupted siblings of the dryads and Keepers of the Grove. But the centaurs' first act was to kill their father. Fearing the wrath of Zaetar's father, the forest lord Cenarius, Theradras buried Zaetar deep within the crystal caverns of Terramok, an ancient Titan vault deep inside what is now Maraudon - the holiest temple of the centaur clans. His spirit remains enthralled by the elemental princess.
Aided by one of Joshmaul's warlock lieutenants, Ordevaas travelled to Desolace and met the Centaur Pariah, an exile who believed that the clans were weakened by the constant infighting and was exiled as a heretic. In order to unite the clans, the Pariah explained, he required the Amulet of Union, a powerful medallion imbued with the gems of the first five Khans of the centaur clans - Kolk, Gelk, Magra, Veng and Maraudos. The Amulet of Spirits, required to bring the spirits of the Khans into the material world and obtain the gems, was held by a centaur known as the Nameless Prophet, who resided just beyond the doors of Maraudon. Ordevaas defeated the Prophet and obtained the Amulet, then proceeded to destroy the spirits of the five Khans and take the gems from them.
While approaching Outer Maraudon, Ordevaas encountered a dryad named Cavindra, who wanted him to aid her brother Celebras, son of Remulos, a Keeper of the Grove who resided in Moonglade. Celebras and his dryads travelled to Maraudon to free Zaetar's spirit from Theradras' domination, but instead were overtaken by the corruption of the satyr Lord Vyletongue that had taken hold in Maraudon. Earlier, Ordevaas had killed Vyletongue and his elemental creation, Noxxion, and obtained the rod and the diamond of the Scepter of Celebras; all that remained was to destroy Celebras' cursed form. With the warlock at his side, Ordevaas did so - and Celebras' spirit appeared to help rebuild the scepter, which would allow Ordevaas to teleport himself and those with him into Inner Maraudon without having to go through the caverns.
After entering Inner Maraudon, Ordevaas was amazed to see that unlike the outer caverns, the place teemed with life - the aftereffect of Zaetar's burial here had blossomed a paradise within the centaur temple. Battling through earthen elementals and giants, Ordevaas came face to face with Theradras herself. With Zaetar's spirit in the balance and the warlock providing powerful spells to aid him, the Blood Knight destroyed Theradras and freed Zaetar's spirit from her domination. The son of Cenarius gave Ordevaas a seed of life, the first seed that blossomed into the beautiful caverns of Inner Maraudon, and instructed him to take it to his brother Remulos in the Moonglade. Travelling through Timbermaw Hold - which was still hostile to him - Ordevaas managed to reach the Keeper at his shrine west of Nighthaven and delivered the seed, the indication that Zaetar had taken his place in nature.
Portalseeker's Revenge: Siege of the Plaguelands
At last having gained the strength to brave the Plaguelands, Ordevaas travelled to Undercity and rode east to the Bulwark, an encampment of the Argent Dawn on the border between Tirisfal Glades and the Western Plaguelands - the front line of the battle against the Scourge in Lordaeron. Before leaving Undercity, Ordevaas was instructed to meet with a fellow Blood Knight named Mehlar Dawnblade, who had a special mission for him, at the Bulwark. Upon arrival, Mehlar spoke of the evils committed against the elves by the Scourge, and the only way to nurse the pain was to destroy the undead forces in the Plaguelands.
To that end, Mehlar instructed Ordevaas to travel into the Western Plaguelands after obtaining an Argent Dawn Commission, allowing him to obtain Scourgestones from the ghouls, zombies and skeletons that wandered the area. There, he was to collect twenty Scourgestones from the lesser minions of the Lich King and bring them back. Once this was done, Mehlar crushed the stones into fragments and gave them to Ordevaas to take to Undercity, to one who knew how to utilize the taint within them: The Banshee Queen, Sylvanas Windrunner.
Scourgebane
Though she was mildly angered by the fact that someone had the temerity to bring such vileness to her - vileness she would prefer to forget - Sylvanas knew that, being one of her own people when she had been alive, Ordevaas bore the same desire for vengeance she did. With that in mind, Sylvanas imparted her wisdom to the Blood Knight, informing him that in order to reconstruct such foulness into a weapon against the Scourge, an equally vile item would be required. Deep within the Temple of Atal'Hakkar was a watery pit that Ordevaas knew well, having explored the temple depths many times. On balconies above that pit were statues. From his past investigations at the behest of Marvon Rivetseeker, Ordevaas knew that in order to summon the beast he was to destroy - the dire troll Atal'alarion - he had to activate the statues in a certain order, and then destroy the creature and take a putrid vine from his corpse. Calling upon the services of one of his Mountie comrades, Ordevaas entered the Temple of Atal'Hakkar and, after clearing a path around the statues, destroyed Atal'alarion and took the putrid vine from his corpse. With the item in hand, Ordevaas returned to Mehlar, who used the vine and the Scourgestone fragments (returned by one of Sylvanas' minions), to create a powerful trinket that would imbue his weapon with undead and demon-slaying energies. Mehlar called it Scourgebane, and Ordevaas noted with some amusement that his daughter Areinnye had also chosen "Scourgebane" as her nom de guerre, much as "Portalseeker" was her father's.
Assault on the Cauldrons
With Scourgebane in his possession, Ordevaas returned to the Western Plaguelands with an incendiary grenade and a Scourge banner, and - aided by others in the area - raided a Scarlet Crusade camp between Felstone Field and Dalson's Tears, two of the four major farms in the area. He burned the tent to the ground and placed a Scourge banner there, having killed every one of the Crusaders who could serve as witnesses to his attack; it was a diversionary move planned by High Executor Derrington at the Bulwark to shift the Crusade's focus from their encampment to the Scourge itself. After this success, Ordevaas began a campaign of destruction through the Western Plaguelands, aided by his Blood Knight comrade Zynn Proudheart, who later became a Master trained by Joshmaul himself. The Argent Dawn and the Forsaken were seeking to turn the four plague cauldrons in the Western Plaguelands against the Scourge.
At Felstone Field, Ordevaas and Zynn confronted and destroyed the Cauldron Lord, a ghoul named Bilemaw, then took his key, unlocked the Scourge cauldron, and took a sample of the poisons within it. This process was repeated with the next three fields and the next three Cauldron Lords - the skeleton Malvinious at Dalson's Tears, the skeleton Razarch at the Writhing Haunt, and the ghost Soulwrath at Gahrron's Withering. With the samples taken, the Argent Dawn could subvert the cauldrons and use them to annihilate the Scourge in the Plaguelands.
The Blood Knight and the Lich: Confronting Araj the Summoner
Once the cauldrons were subverted, Ordevaas was given a new mission: to mark the towers surrounding the destroyed city of Andorhal, where the Scourge began in Lordaeron. With the towers marked, the Argent Dawn could more easily attack the Scourge within. Once this task was done, Derrington gave him a new quest: Destroy the ruler of Andorhal, the lich Araj.
The Summoner, formerly the headmaster of the nearby Scholomance, was responsible for ensuring the success of the cauldrons' corruption. With that task now failed, Araj was a prime target for destruction - and Ordevaas doubted that the Summoner's master, Kel'Thuzad, would particularly care about Araj's fate, even though it would be a great victory for the enemies of the Scourge. With that in mind, Ordevaas and Zynn agreed that even the two of them together were not enough to combat Araj. And so Ordevaas contacted an ally of his master Joshmaul, the undead mage Maruz. The mage agreed to aid the two Blood Knights in confronting the lich. "Araj will fold like a lawn chair," Maruz boasted, and with his powers over the arcane, Araj was indeed defeated quickly, as were all of his minions. Taking a piece of Araj's phylactery, Ordevaas returned it to the Bulwark, where he was lauded for his efforts by the Argent Dawn and the Horde as a whole. He buried the remainder of the phylactery deep inside Andorhal, where only he would find it later...in case some other artifact was required.
The Skeleton Key
Not long afterwards, Ordevaas received a mission from Alchemist Arbington at the Bulwark to obtain the key to the Scholomance. Taking skeletal fragments from the Scourge of the Western Plaguelands and having Arbington imbue them, Ordevaas travelled to Tanaris to the goblin Krinkle Goodsteel in Gadgetzan, paying the price required for the key mold. Taking the mold and two bars of thorium, he took it to Fire Plume Ridge in Un'goro Crater and - with the immense heat of the lava pool at its summit - melted the thorium into the mold, leaving a key with no head inside. With the unfinished key in hand, Ordevaas returned to Andorhal to find Araj's signet - a small stone scarab - to serve as the key's head. Ordevaas dug up the phylactery and sure enough, there was the scarab waiting to be picked up. Now he had a way to get into Scholomance.
The Blightcaller's Command
While adventuring in the Western Plaguelands, Ordevaas received a notice from Undercity to go before Sylvanas, who immediately sent him to her Champion, Nathanos Marris - better known as the Blightcaller. He resided at his old house in what was now the Eastern Plaguelands, northwest of Darrowshire.
Upon arrival, the Blightcaller looked upon the new "recruit" with disdain, expecting to feed the luckless paladin to his Blighthounds. In order to avoid that fate, Ordevaas had to collect "living rot" from the undead that lived in Corin's Crossing - the birthplace of his old comrade Saavedro. Once he had enough, he had to use a bowl and pestle and let the rot coagulate in order to feed it to Nathanos' hounds. With that task done, Nathanos sent him on two more quests: To clear out the noxious and monstrous plaguebats that resided in the area. Once that was done, he sent Ordevaas - with a little help - to the Quel'Lithien Lodge, on the border between Lordaeron and Quel'Thalas. He commanded that the Quel'Thalas Registry be brought to him, and the lodge's inhabitants killed. He also warned Ordevaas not to read from the book.
Curiosity caught up with him, however; upon leaving Quel'Lithien for the safety of Light's Hope Chapel, Ordevaas opened the book and saw that Nathanos had been a human ranger lord - the first and the last - in life, and had been trained by none other than Sylvanas Windrunner herself. Now in an ironic twist, both were undead - Sylvanas was the Queen of the Forsaken, and Nathanos her Champion. After transcribing the text, Ordevaas returned it to Nathanos. Afterwards, the Blightcaller gave Ordevaas two new targets: The albino plaguebat Duskwing and the huge carrion worm Borelgore. Duskwing proved to be easier; Borelgore, however, required expert assistance...
The Discs of Norgannon and the Portents of Uldum
Ordevaas had travelled into Uldaman several times before, but was unable to obtain the Discs of Norgannon for himself. Returning a third time, Ordevaas opened the treasure fault in Khaz'goroth's Seat - defeating the reconstituted guardian Archaedas - and accessed the Discs of Norgannon, went through the questions with the Lorekeeper of Norgannon, and finally received a copy of the Discs for himself. He knew that the sages of Thunder Bluff, renowned throughout the Horde for their knowledge, would be able to understand the nature of the artifacts he had found. Travelling across the Great Sea to Kalimdor, Ordevaas arrived in Thunder Bluff and spoke to the sage Truthseeker, in a lodge connecting the center of Thunder Bluff to one of the other rises. Truthseeker sent him to Nara Wildmane on the Elder Rise, where he delivered the Discs. He was contacted again by Truthseeker, and informed of a place called Uldum - located in the wastes of southern Tanaris.
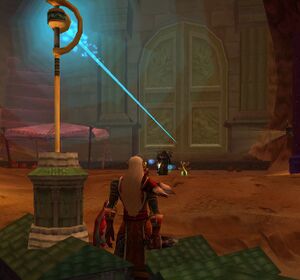
Returning to Wildmane and reobtaining his copy of the Discs of Norgannon, Ordevaas travelled to Tanaris and brought the Discs to a pedestal outside the main gate of Uldum. He discovered that he was missing the "Plates of Uldum", which would allow entry into the area, but had no idea where to find them. With that information, he returned to Thunder Bluff at an impasse.
The Secrets of the Pylons
Travelling into the dense jungle environment of Un'Goro Crater, Ordevaas felt that he had stepped millennia back in time to the primordial origins of Azeroth. Prehistoric creatures of all kinds littered the landscape, and he encountered everything from angry elementals to dinosaurs to tar monsters, and even silithids. One of the things he discovered, exploring around the rim of the crater, were three crystal pylons, located on the northern, western and eastern edges. Power crystals were littered throughout Un'Goro Crater, and Ordevaas - aided by his master Joshmaul - was able to discern what the pylons were used for.

